Git is a distributed version control system that is widely used by a number of open source projects. It was started in the year 2005 by Linux founder, Linus Torvalds. The program allows for a non-linear development of projects, and can handle large amounts of data effectively by storing it on the local server. In this tutorial, we are going to play around Git and learn how to get started with it.
I am using Ubuntu in this tutorial but you can use any Linux distribution of your choice. Apart from installation, rest all commands are the same in all Linux distributions.
To install git on Ubuntu and other Ubuntu-based systems, run this command :
sudo apt-get install git-core
After it finishes downloading, you will have Git installed and ready to use.
After Git is installed, whether from apt-get or from the source, you need to copy your username and email in the gitconfig file. You can access this file at ~/.gitconfig.
Opening it following a fresh Git install would reveal a completely blank page:
sudo vim ~/.gitconfig
You can use the follow commands to add in the required information. Replace ‘user’ with your username and ‘user@example.com’ with your email.
git config --global user.name "User"
git config --global user.email user@example.com
And you are done with setting up! Now let’s get started with Git.
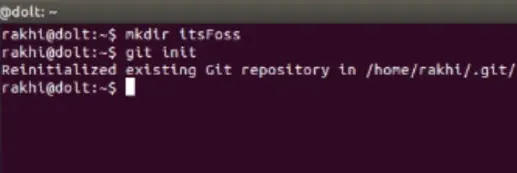
Create a new directory, open it and run this command:
git init
This will create a new git repository. Your local repository consists of three “trees” maintained by git.
First one is your Working Directory which holds the actual files. Second one is the Index which acts as a staging area and finally the HEAD which points to the last commit you’ve made.checkout your repository using git clone /path/to/repository.
Checkout your repository (repository you just created or an existing repository on a server) using git clone /path/to/repository.
You can propose changes using:
git add filename
This will add a new file for the commit. If you want to add every new file, then just do:
git add --all
Your files are added check your status using
git status
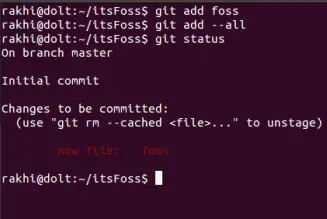
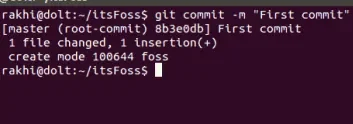
As you can see, there are changes but they are not committed. Now you need to commit these changes, use:
git commit -m "Commit message"
You can also do (preferred):
git commit -a
And then write your commit message. Now the file is committed to the HEAD, but not in your remote repository yet.
Your changes are in the HEAD of your local working copy. If you have not cloned an existing repository and want to connect your repository to a remote server, you need to add it first with:
git remote add origin serveraddress
Now you are able to push your changes to the selected remote server.To send those changes to your remote repository, run:
git push -u origin master
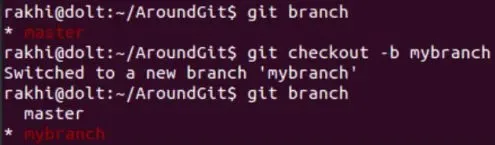
Branches are used to develop features which are isolated from each other. The master branch is the “default” branch when you create a repository. Use other branches for development and merge them back to the master branch upon completion.
Create a new branch named “mybranch” and switch to it using:
git checkout -b mybranch
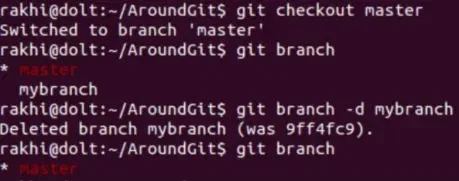
You can switch back to master by running:
git checkout master
If you want to delete the branch use:
git branch -d mybranch
A branch is not available to others unless you push the branch to your remote repository, so what are you thinking about just push it:
git push origin
To update your local repository to the newest commit, run:
git pull
In your working directory to fetch and merge remote changes.To merge another branch into your active branch (e.g. master), use :
git merge branch
In both cases, git tries to auto-merge changes. Unfortunately, this is not always possible and results in conflicts. You are responsible for merging those conflicts manually by editing the files shown by git. After changing, you need to mark them as merged with
git add filename
Before merging changes, you can also preview them by using
git diff sourcebranch targetbranch
You can see the repository history using.
git log
To see a log where each commit is one line you can use:
git log --pretty=oneline
Or maybe you want to see an ASCII art tree of all the branches, decorated with the names of tags and branches:
git log --graph --oneline --decorate --all
If you want to see only which files have changed:
git log --name-status
The GitHub team has created a library of educational videos and guides to help users continue to develop their skills and build better software: